What “Buttons After Swap” Actually Means
When people say “my buttons are messed up after I swapped the shell,” they usually mean one of four things:
- A button physically sticks (you press it, it stays down, or it comes back up slowly).
- A button feels fine but doesn’t register every time.
- A button registers by itself (ghost presses) or double-triggers.
- Everything works… until you tighten the last screw.
Same symptom, different causes. And if you try to “fix sticky buttons” by randomly sanding plastic, you can absolutely make it worse.
A shell swap changes tolerances. That’s the whole story. You took a system that was designed as a stack of tiny parts—shell, button caps, silicone membranes, PCB, screw posts, triggers, springs—and you replaced the one part that touches almost all the others.
Sometimes you win. Sometimes you get a controller that feels like it’s chewing gum.
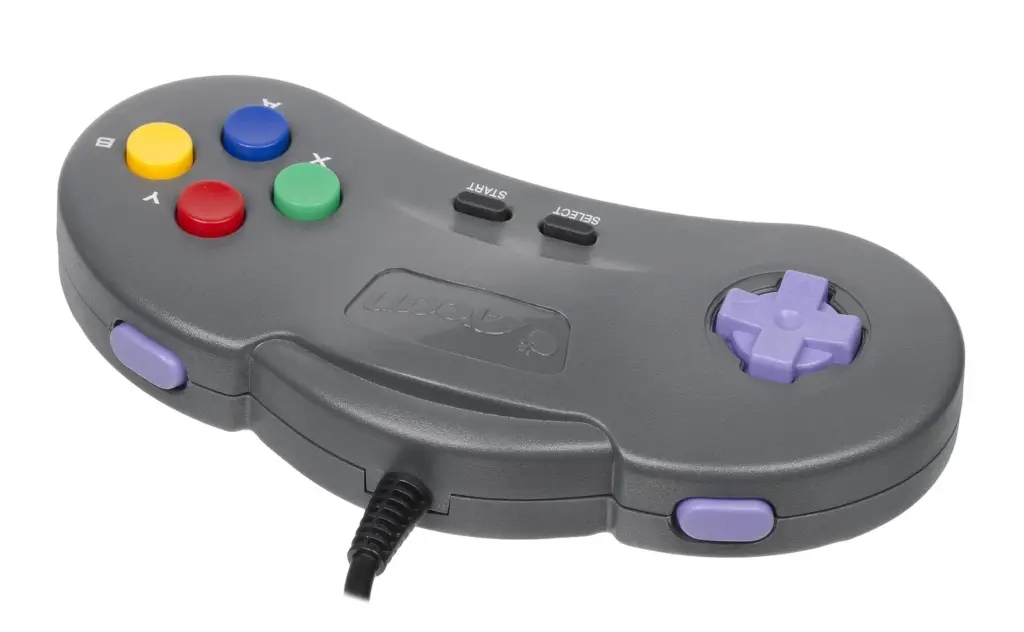
What’s Going On Under the Button
Most modern controllers use a simple mechanical sandwich:
- Button cap (the plastic piece your thumb touches)
- A guide/well in the shell (keeps the cap centered)
- Silicone membrane (the squishy “return spring” and the contact pusher)
- PCB contact pads (where the press becomes an electrical signal)
If the button sticks, it’s almost always a friction problem in the shell’s guide/well, or the membrane is pinched or mis-seated.
If the button is unresponsive, it’s usually one of these: - The membrane isn’t lined up over the contact pads.
- The PCB is slightly flexed because the shell posts don’t match the old shell.
- The button cap is bottoming out early (hits plastic before it fully compresses the membrane).
- Gunk. Oil. Old soda. The boring stuff that becomes obvious only after you touch everything.
I’m going to say the annoying thing out loud: aftermarket shells vary. Some are great. Some are “close enough” in a way that ruins your weekend.
The Two-Minute Triage (Before You Reopen Anything)
Do this first. It’s fast, and it tells you where to look.
- Press the problem button very slowly.
- If you feel a scratchy drag on one side, that’s shell friction or a warped button cap.
- Press it and release, then gently tap the controller.
- If the button pops back up after a tap, that’s sticking in the guide, not an electrical issue.
- Compare with a “good” button.
- You’re listening for the return snap. Not loud. Just crisp.
- Loosen the shell screws one quarter-turn (yes, really).
- If the button suddenly behaves, the shell is compressing the stack wrong. That points to misalignment, missing foam/pads, or screw post differences.
Tiny test. Huge signal.
Tools and Supplies That Actually Matter
You don’t need a lab. You need a few specific things:
- 90%+ isopropyl alcohol (for cleaning plastic and PCB contacts)
- Cotton swabs or lint-free wipes
- Tweezers (for membranes and tiny bits)
- A small screwdriver set that fits properly (stripping a screw is its own hobby)
- Optional but useful: plastic-safe dry lubricant (PTFE-based). Use it sparingly.
- Optional: a fine nail file or very fine sandpaper (1000+ grit). Only if you’re sure you have a high spot.
Skip WD-40. Skip cooking oil. Skip “I’ll just spray something in there.” That’s how you turn a tolerances problem into a grime magnet.
The Big Causes (And How They Feel)
1) Button cap rubbing the shell wall
Feels like: gritty, sideways drag; sticks more when pressed at an angle.
Why it happens: the new shell’s button well is slightly tighter, or the button cap is slightly larger, or the cap has a molding seam that now matters.
2) Membrane not seated flat
Feels like: mushy press, inconsistent actuation, sometimes “dead” unless you press hard.
Why it happens: membrane shifted during assembly, got folded, or got trapped under a plastic edge.
3) PCB or frame not sitting square
Feels like: everything works until you fully tighten screws; multiple buttons get weird together.
Why it happens: screw post height is off, or internal brackets don’t match perfectly between shells, or a cable is routed wrong and is pushing something.
4) Dirt introduced during the swap
Feels like: sticky return, but not always scratchy; sometimes a button feels “slow.”
Why it happens: skin oils, dust, leftover adhesive, tiny plastic shavings.
5) Wrong parts mixed together
Feels like: one specific button never feels right no matter what you do.
Why it happens: you reused old buttons with a new shell (fine sometimes), or the kit’s buttons are slightly different height/profile, or a membrane set isn’t the right one for your controller revision.
I can’t tell you how many “controller repair” stories are just “these parts were never meant to be friends.”
Reopen the Controller Without Making It Worse
Open it again. Carefully. No rushing.
Before you pull anything out, take a photo of the internal layout with your phone. I know, I know. Do it anyway. Cable routing and tiny foam pieces are the kind of detail your brain deletes immediately.
A few handling rules that save you pain:
- Don’t touch the PCB contact pads with your fingers if you can avoid it.
- Keep membranes oriented. If one side has little alignment nubs, that side matters.
- Keep screws grouped by location. Some controllers use different lengths.
If you feel yourself getting impatient, stop. This is the part where people snap a ribbon cable latch and then suddenly the “stuck button” is the least of their problems.
Fixing Sticky Buttons: The Physical Fit Checklist
This is the heart of it. You’re going to test-fit parts and look for rub points.
Step 1: Test the button cap in the shell with nothing else installed
Take the shell half that holds the face buttons. Drop a single button cap into its well.
Press it with your finger.
- Does it fall in and pop back out freely?
- Does it bind if you press the edge of the cap?
Flip the shell at a slight angle. The button should rattle a little and settle. If it wedges, you found your friction.
Short version. No excuses.
Step 2: Look for the “shiny scrape”
If a button is rubbing, it often leaves a shiny line on the side of the button cap or inside the shell well. That’s your clue.
If you see a single high spot (like a molding seam), you can very lightly knock it down with a fine file. Very lightly. One or two passes, then test again.
Do not go on a sanding adventure. You’re not sculpting marble. You’re removing a hair’s width.
Step 3: Clean the button wells and caps
Even brand-new shells can have manufacturing residue. Even careful DIY work leaves dust.
- Alcohol on a swab
- Wipe inside the wells
- Wipe the button sides (not just the top)
Let it dry fully. Alcohol evaporates fast, but trapped moisture in a corner is still annoying.
Step 4: Consider dry lube (sparingly)
If the fit is almost good, a tiny bit of plastic-safe dry lubricant can help.
Tiny means tiny:
- Put a dot on a swab
- Wipe it around the inside wall of the well
- Then wipe again with the clean side of the swab so you’re leaving a film, not a paste
If you can see it, you used too much.
The Membrane and Contact Side (Where “Unresponsive” Lives)
If sticking is the mechanical story, unresponsive buttons are usually the membrane/PCB story.
Step 1: Inspect the silicone membrane
Look for:
- Tears or stretched areas
- Permanent deformation (a dome that doesn’t rebound)
- Misaligned holes or nubs
If the membrane was already worn before your swap, the shell change might just be the moment it finally started acting up.
Step 2: Clean the PCB contact pads
Use isopropyl alcohol and a lint-free swab. Gently.
You’re removing oils, not sanding a deck.
If you see obvious grime, keep wiping until the swab comes away clean. Let it dry.
Step 3: Align the membrane precisely
This sounds obvious. It’s not, in practice.
Most membranes have alignment pegs that sit in matching holes. If those pegs aren’t fully seated, the membrane can sit skewed. Then you get presses that feel okay but don’t hit the pad squarely.
And here’s the sneaky one: the membrane can look aligned until you tighten the shell, and then it slides.
So do a dry assembly test:
- Place membrane
- Place PCB/frame
- Hold it together with your hand pressure (no screws)
- Press the problem button area
If it suddenly works when hand-held, your screw compression is the variable.
When Screws Change Everything
This is the part that makes me sigh, because it feels like superstition until you see it.
If tightening the case makes buttons stick or go dead, you likely have one of these:
- A cable or wire is routed under a post and is lifting the PCB.
- A foam pad, gasket, or little plastic bracket is missing or in the wrong spot.
- The new shell’s screw posts are slightly taller/shorter, changing the clamp pressure.
- You overtightened and warped the shell half.
Two quick tactics:
- Tighten screws gradually in an alternating pattern.
Not “all the way down on one screw, then the next.” Alternate. Bring the shell together evenly. - Find the “bad screw.”
Tighten everything lightly, then tighten one screw at a time while testing the button. If one screw “kills” the button, that screw post area is forcing misalignment. That’s your target zone to inspect for pinched membrane, trapped cable, or a post that needs a tiny washer/spacer (only if you know what you’re doing).
And yes, sometimes the fix is literally “don’t crank it like a lug nut.”
Common Mistakes People Swear Aren’t the Problem
“The button is sticky, so I’ll add grease”
No. Grease traps dust. It migrates. It makes a paste. If you want lubrication, use a dry film and use almost nothing.
“It’s unresponsive, so the PCB must be broken”
Sometimes. But after a shell swap, mechanical alignment is the prime suspect. If multiple buttons act up only after reassembly, it’s rarely a sudden PCB failure.
“I cleaned it; it can’t be dirt”
If you did a shell swap on a kitchen table, I promise you introduced dust. Not a moral failing. Just reality.
“Aftermarket shells are all the same”
They’re not. Even between batches from the same listing, tolerances can drift. That’s why one person leaves a five-star review and another person writes a rage novel.
Model-Specific Notes (Without Pretending I Know Your Exact Controller)
Different controllers do button stacks differently, but the failure modes rhyme.
- Some designs use separate inner frames that must seat perfectly before the shell closes.
- Some use more springs (triggers especially), and a spring slightly out of place can push on the shell and shift everything.
- Some have ribbon cables that love to sit exactly where a post wants to crush them.
If your reference point is “I saw a DIY shell swap video for a Switch or PS5 controller,” the big takeaway is consistent: shell swaps are half cleaning job, half alignment job. People focus on the fun cosmetic part and rush the boring fit checks. Then they end up reopening it three times, which is the opposite of fun.
A Simple Troubleshooting Map (So You Don’t Spiral)
Pick the symptom and follow the path.
Button sticks physically
- Test button cap alone in shell well
- Clean well + cap sides
- Identify shiny scrape / high seam
- Micro-file if needed
- Optional dry lube film
- Reassemble and avoid overtightening
Button feels fine but doesn’t register
- Clean PCB contact pads
- Confirm membrane isn’t folded/pinched
- Confirm alignment pegs seated
- Check for PCB flex when shell tightened
- Check for trapped cable/foam near posts
Works until the final screw
- Tighten gradually in alternating pattern
- Identify the one screw that triggers failure
- Inspect that post area for interference
- Check that internal frame is fully seated
Multiple buttons feel off
- Suspect shell compression / internal frame seating
- Suspect wrong membrane set or misrouted cable
- Suspect missing bracket/pad you didn’t notice mattered
When to Stop “Fixing” and Swap Parts Back
Here’s my biased opinion: if you’ve confirmed the button cap binds in the new shell even when it’s totally clean and alone, that shell is the problem. You can sand and tweak, sure, but you’re basically doing custom fitting on a mass-produced part.
If this is your daily controller and you value your time, consider:
- Reusing the original shell (boring, effective)
- Returning the new shell
- Swapping only the faceplate/buttons if the rear shell posts are the mismatch
- Buying a higher-quality shell from a seller with consistent fit reports (not just “looks cool” photos)
There’s a point where “controller repair” turns into “I’m now a part-time plastics technician,” and I didn’t sign you up for that.
Quick Reassembly Habits That Prevent Repeat Problems
- Wash your hands before handling membranes and button caps. Oils matter.
- Do a “button cap only” fit test before you involve electronics.
- Take one photo per layer as you disassemble. It saves you from guessing.
- Never force a shell closed. If it doesn’t want to close, something is in the wrong place.
- After you close it but before final tightening, press every button once. Catch problems early.
And if you’re sitting there at midnight pressing the same button 200 times, trying to decide if it’s “better”… yeah. I’ve been there. That’s usually when loosening one screw a quarter-turn suddenly makes you feel like you found a cheat code.