Prep and a Safe Workspace
Cleaning a console shell sounds simple, but the “safe” part mostly comes from the setup. Modern plastics and coatings can handle light soap and alcohol, yet they do not forgive harsh solvents, soaking, or aggressive abrasion. A few minutes of prep prevents the usual disasters, including streaky gloss patches, softened plastic, and liquid that sneaks into seams.
Start by picking a workspace that is bright and calm, ideally with a table that can handle a little moisture. Put down a clean towel or a silicone mat so a PS5 faceplate or a Joy-Con does not slide and get scratched. Good lighting matters because grime often sits in textured areas and around button edges, and it is easy to miss until everything dries.
Before touching anything wet, power devices fully off and disconnect all cables. For a PS5, shut it down (not Rest Mode), unplug the power cord, and let it cool for at least 10 to 15 minutes so vents and internal metal are not warm. For a Nintendo Switch and controllers, power down and remove any accessories that trap dirt, including grips, cases, thumbstick caps, and wrist straps.
Gather supplies that are plastic-friendly and predictable, including these common items.
- Microfiber cloths that are clean and lint-free
- Cotton swabs and soft makeup brushes for seams
- A soft toothbrush for textured plastic, used gently
- Mild dish soap, plus a small bowl of warm water
- Distilled water for a final wipe when tap water is hard
- Isopropyl alcohol, often 70 percent is a safer default, 90 to 99 percent evaporates faster but can be more drying on some finishes
- Compressed air, optional, used lightly and at a distance
- Nitrile gloves, optional, for avoiding fingerprints while reassembling
Skip products that create most of the damage stories. That includes acetone, paint thinner, bleach, ammonia-heavy glass cleaner, citrus degreasers, and “magic eraser” melamine foam on visible exterior surfaces. Melamine foam is basically micro-abrasive, so it can quietly turn a uniform sheen into a shiny spot, especially on textured or matte shells.
A final prep step that helps a lot is taking quick photos before any disassembly. Even if no deep teardown is planned, photos help confirm where dust was coming from and whether a streak was present before cleaning.
Step by Step Cleaning Workflows
Different parts need different handling because they have different risks. A removable PS5 plate can be washed more like a durable plastic panel, while a Switch Joy-Con shell sits directly over electronics and has lots of openings that love to wick in liquid. The safest flow is to clean from dry to damp, and from the outside inward, so debris does not get pushed into seams.
PS5 exterior shell and vents
For many PS5 models, the side panels can be removed without tools. If the panels come off, cleaning becomes easier and safer because liquid can stay away from the main chassis.
- Power the PS5 off, unplug it, and move it to the workspace.
- Remove the side panels if comfortable doing so, following the correct slide and lift motion for the specific model. Do not force it, because snapped clips are common when the motion is wrong.
- Start dry. Use a microfiber cloth to wipe broad surfaces, then a soft brush to loosen dust in the textured areas.
- For vents and edges, use a cotton swab that is dry first. If using compressed air, keep the can upright and use short bursts from several inches away, so condensation does not spit onto plastic.
- Prepare a mild soap solution using a drop of dish soap in warm water. Dampen, not soak, a microfiber cloth. Wipe the panel in small sections, and follow with a second cloth dampened with plain distilled water to remove soap residue.
- Dry immediately with a clean microfiber cloth, then let panels air-dry fully before reinstalling. If the panel was noticeably wet, giving it several hours is sensible.
If panels are not removed, the same technique applies, just with extra restraint around seams, ports, and vents. A cloth should be barely damp near openings. Liquids should never be poured or sprayed directly on a console shell.
PS5 DualSense controller shell
Controllers combine textured plastic, glossy accents, and rubberized parts, so the goal is a controlled wipe, plus careful seam work.
- Turn the controller off and disconnect it from USB.
- Dry wipe first to remove grit that can scratch while wiping damp.
- Dampen a microfiber cloth with either plain water and a tiny bit of soap, or a small amount of isopropyl alcohol on the cloth, not directly on the controller. Wipe the grips and face, staying light around the touchpad seam and button edges.
- Use a cotton swab lightly moistened with isopropyl alcohol to clean around the buttons, D-pad, and triggers. Roll the swab as it collects grime so it keeps lifting dirt rather than smearing it.
- For the thumbsticks, clean the rim where the stick meets the shell. Move the stick in circles while wiping the crevice. Use minimal liquid, because the stick modules sit right underneath.
- Finish with a dry microfiber cloth, then let the controller sit for 10 to 20 minutes before use so any alcohol fully evaporates.
If stick tops feel oily, avoid strong solvents. A tiny amount of mild soap on a cloth, followed by a distilled water wipe, usually removes skin oils without changing texture.
Nintendo Switch console shell and screen edges
The Switch is portable, so it picks up skin oils and dust, especially around the rails and the back texture. The main caution is keeping moisture away from ports, speakers, vents, and the game card slot.
- Power the Switch off, remove game cards, and detach Joy-Cons.
- Dry wipe the back and sides with microfiber to remove grit.
- Use a slightly damp microfiber cloth with mild soap solution to wipe the exterior shell. Keep the cloth barely damp near the USB-C port, vents, and speaker grilles.
- For grime in the back texture, use a soft toothbrush that is only lightly damp, brushing gently and then wiping with microfiber.
- Clean around the screen bezel edges with a dry swab first, then a barely moistened swab if needed. Avoid pushing debris toward the display.
For the screen itself, use a dedicated screen-safe microfiber cloth. If a cleaner is needed, distilled water is usually enough. If using alcohol on the screen, use it sparingly and only if the screen protector and manufacturer guidance allow it, because coatings and protectors can vary.
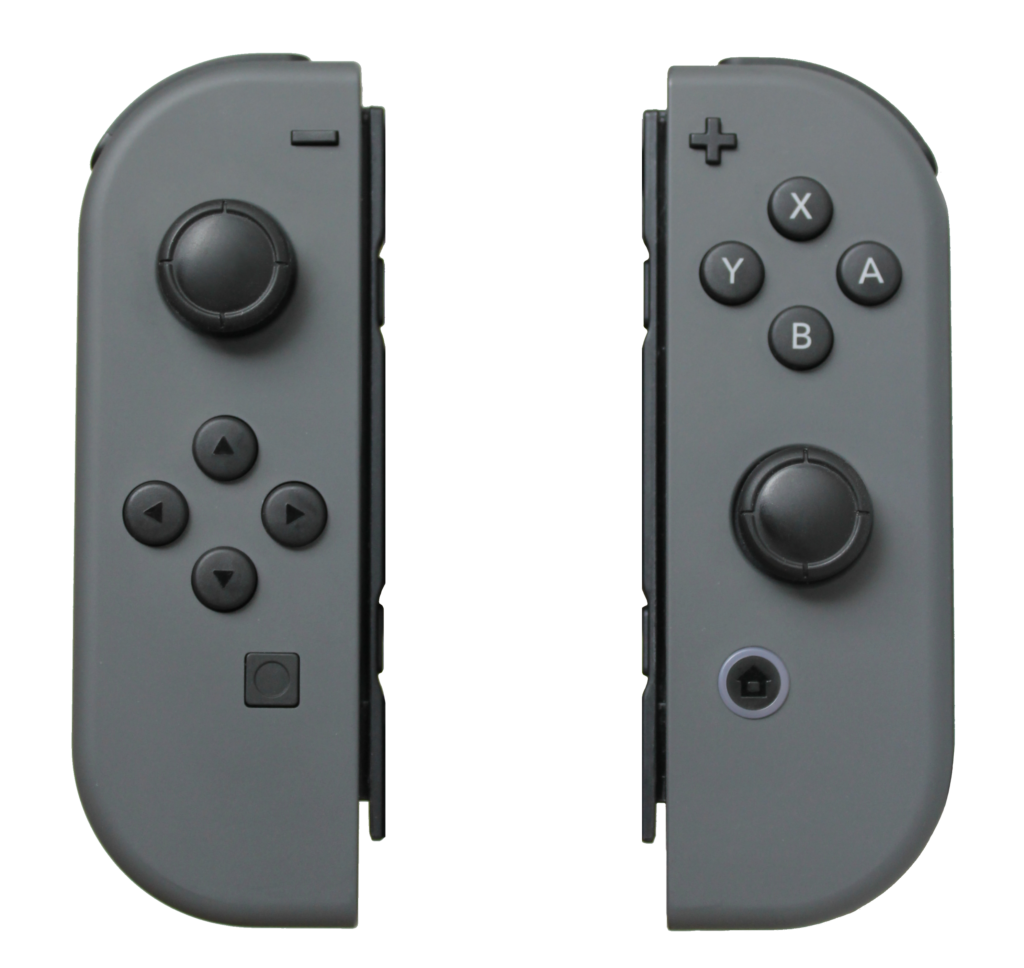
Switch Joy-Con and Pro Controller shells
Joy-Cons are the most delicate cleaning job because openings are everywhere, including stick bases, button gaps, rail channels, and the sync button area.
- Start with a dry brush around buttons and the stick base to lift dust.
- Wipe the shell with a microfiber cloth lightly dampened with water and mild soap, keeping liquid away from the rail and buttons.
- For the rail and the small grooves, use a cotton swab that is barely damp with isopropyl alcohol. Wipe along the rail channel, then let it dry fully.
- Clean around the analog stick by moving the stick and wiping the ring. Use very small amounts of alcohol on a swab, because excess can run into the stick module.
- For the button edges, use the “press and wipe” method. Press the button and wipe the newly exposed edge, then release and repeat around the perimeter.
- Dry everything with microfiber and let it sit before reattaching to the Switch.
For a Switch Pro Controller, the approach is similar to DualSense, just with extra attention around the stick rings and the seam lines on the grips.
Materials, Coatings, and Key Safety Details
Most “safe plastic cleaning” guidance is really about not changing the surface. A shell can look clean but still be damaged if the finish gets micro-scratched or chemically dulled. The next points are the ones that typically decide whether the result looks factory-new or “kind of weird” under light.
Use soap and water for general grime, and use isopropyl alcohol mainly for spot work. Soap lifts skin oils and food residue well, while alcohol is excellent for sticky spots and disinfecting, but it can be drying and can highlight existing wear on textured plastics. Using alcohol on a cloth instead of spraying it reduces the chance of it running into seams.
Treat glossy plastic differently than matte or textured plastic. Glossy areas show swirl marks easily, so use only microfiber and light pressure. Textured areas hide light scratches but can trap soap, so a distilled water follow-up wipe helps prevent faint residue that looks like chalk.
Avoid aggressive abrasives even if they “work fast.” That includes melamine foam, rough paper towels, and gritty cleaners. Paper towels can be fine for emergency wiping, but they are more likely to leave micro-scratches on glossy trim and clear plastics.
Be careful with “disinfectant wipes” that are not plastic-specific. Many household wipes include additives that can leave a film, and some include stronger solvents. If wipes are used, choose ones labeled safe for plastics, and still follow with a dry microfiber wipe so residue does not build up.
Keep moisture out of openings, even if the liquid seems harmless. Water plus dust can become a conductive grime, and corrosion does not need a flood to start. The common failure points include USB-C ports, headphone jacks, trigger seams, stick modules, and speaker grilles.
If disassembly is on the table, keep it limited and intentional. Removing a PS5 faceplate is low risk for many users, but opening a controller shell is a different tier. It can affect warranties, strip screws, and tear ribbon cables. If the main goal is cosmetic cleaning, external methods usually get 90 percent of the improvement with far less downside.
Also, watch out for heat. Some people try to “dry faster” with a hair dryer. Warm air can soften plastics and can push dust deeper into seams, plus it can warp thin parts. Air drying at room temperature is slower but safer.
Common Problems and Practical Fixes
A lot of cleaning frustrations come from one of three things, residue, discoloration, or debris that is actually inside the device rather than on the shell. Handling each one differently saves time.
Sticky residue that smears
Stickers, spilled soda, and hand lotion can leave residue that smears across plastic.
- Start with mild soap on a damp cloth, wipe, then rinse-wipe with distilled water.
- If it still smears, use a small amount of isopropyl alcohol on a cloth and dab, then wipe. Do not scrub hard, because friction can polish a spot.
- For very stubborn adhesive, avoid “goo remover” solvents unless they are explicitly plastic-safe. Even then, test on an unseen area first, like the inside of a removable PS5 plate.
If residue seems to “come back” after drying, it is often soap film. A second wipe with distilled water, followed by a dry microfiber buff, usually fixes that.
White haze or streaks after cleaning
Streaks are usually either hard-water minerals or cleaner residue.
- Switch to distilled water for the final wipe.
- Use a clean microfiber cloth, because detergent residue from laundry can cause streaking.
- Reduce product. Many surfaces streak more when they are over-wet, not under-wet.
On matte shells, haze can also be micro-abrasion. If a surface was scrubbed with something rough, the only real “fix” is to stop and accept minor wear rather than digging a deeper hole with more rubbing.
Yellowing or uneven color
Some plastics yellow with UV exposure, skin oils, and time. Cleaning helps, but it cannot reverse plastic oxidation the way a repaint or restoration treatment might.
- Try a deep clean with mild soap and a soft brush, then rinse-wipe with distilled water.
- Avoid strong whitening hacks, because peroxide-based treatments can create uneven patches and can weaken plastics if done poorly.
- For Switch Joy-Cons with discoloration, consider a protective case going forward. It reduces new staining and also reduces how often heavy cleaning is needed.
Grime packed around buttons and stick rings
If buttons feel gritty, the dirt is usually compacted at the edge.
- Use the press-and-wipe approach around each button.
- Use a barely damp alcohol swab for the edge, then follow with a dry swab.
- If the gritty feel remains, it may be internal debris. External cleaning will not fully change the feel without disassembly.
For analog sticks, avoid flooding the stick base. A little cleaning around the ring helps cosmetics, but it will not fix electrical drift that comes from wear inside the module.
Drift, double inputs, or connection issues after cleaning
If a controller starts acting up right after cleaning, the most likely cause is moisture that found its way inside.
- Turn the controller off, disconnect it, and let it air dry for several hours in a dry room.
- Do not charge it while it is drying, because heat plus trapped moisture is not a great mix.
- If the issue persists after a full dry period, it may be coincidence, but it can also mean liquid contacted internal parts. At that point, professional repair or careful internal inspection becomes the safer route than repeated external cleaning.
For Joy-Con connection issues, also inspect the rail. Dirt or residue on the rail contacts can cause flaky attachment. Lightly cleaning the rail with a barely damp alcohol swab, then drying, is often enough.
Checking Results and Keeping Them Clean
A good cleaning result is not only “looks shiny,” it also means nothing got into places it should not, and the finish still looks consistent under different lighting. A quick evaluation routine makes the next cleaning easier, because it establishes what “normal” looks like.
After everything is dry, inspect under bright light from multiple angles. Look for streaks on glossy areas, and look for chalky patches on matte areas that can indicate residue. Run a fingertip lightly across the surface. It should feel even, not tacky, not squeaky, and not gritty at seams.
Reassemble carefully. For a PS5, reinstall plates without forcing, and confirm they sit flush with no unusual gaps. For Switch and controllers, confirm ports and buttons feel normal before fully putting on cases or grips.
For ongoing maintenance, a light schedule beats occasional aggressive scrubbing.
- Weekly or biweekly, do a dry microfiber wipe for skin oils and dust. This is the easiest way to keep a clean PS5 shell looking uniform.
- Monthly, do targeted seam cleaning on controllers, including around thumbsticks and triggers, using a dry brush and a lightly damp swab as needed.
- After travel or parties, do a quick pass on the Switch and Joy-Cons, since food residue and lotions are common in those situations.
A small habit that really reduces grime is washing hands before long play sessions, or at least avoiding snacks that leave oils. It sounds picky, but it directly reduces the sticky film that traps dust on textured plastic.
If deeper restoration is the goal, like fixing scratches or heavy discoloration, treat that as a separate project from cleaning. Cleaning is about removing foreign material safely. Restoration often involves abrasion, heat, repainting, or part replacement, and it is easy to cross the line and permanently change the finish if it is done casually.