Replacing your Nintendo Switch shell transforms a worn or scratched console into something that looks brand new—or completely custom. This guide walks you through the entire process, from gathering tools to reassembly, with tips that help you avoid the most common mistakes.
What You’ll Learn
- ✅ Tools required for shell replacement
- ✅ Step-by-step Joy-Con shell swap
- ✅ Console back plate and front frame replacement
- ✅ Common mistakes and how to avoid them
- ✅ Troubleshooting button and ribbon cable issues
Time Required: 60-90 minutes (full set) | 30-45 minutes (Joy-Cons only)
Difficulty: Moderate to Difficult
Before You Start: Compatibility Check
Not all shells fit all Switch models. Before purchasing, confirm your console version:
| Model | Model Number | Shell Compatibility |
|---|---|---|
| Switch (Original) | HAC-001 | Standard Switch shells |
| Switch V2 | HAC-001(-01) | Standard Switch shells |
| Switch OLED | HEG-001 | OLED-specific shells only |
| Switch Lite | HDH-001 | Lite-specific shells only |
How to check: Go to Settings > System > Serial Information on your Switch, or check the model number on the bottom of the console.
⚠️ Important: Switch OLED and Switch Lite shells are NOT interchangeable with the original/V2 Switch. Joy-Con shells work across original Switch, V2, and OLED models.
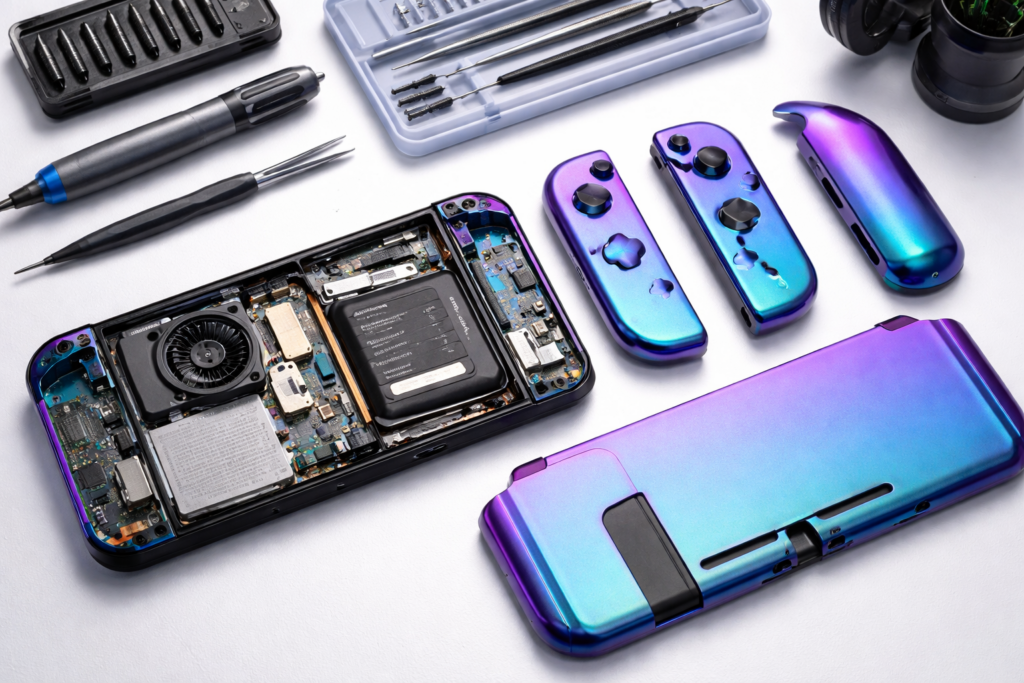
Tools and Materials Needed
Required Tools
| Tool | Purpose | Included in Kit? |
|---|---|---|
| Tri-wing Y00 screwdriver | Back plate screws | Usually yes |
| Phillips #00 screwdriver | Internal screws | Usually yes |
| Plastic spudger | Prying clips, lifting cables | Usually yes |
| Tweezers | Handling small parts, ribbon cables | Sometimes |
| Magnetic screw mat | Organizing screws by location | Rarely |
Recommended Additions
- Magnetic project mat — Keeps screws organized and prevents loss
- Good lighting — LED desk lamp or ring light
- Clean workspace — Dust-free surface, preferably anti-static
- Small containers — For grouping screws by step
Shell Kit Options from ModZone
| Product | What’s Included | Price |
|---|---|---|
| Joy-Con Shell Kit (Chameleon Purple Blue) | Left + right Joy-Con housing, buttons, tools | $23.97 |
| Joy-Con D-Pad Shell (Glacier Blue) | Left Joy-Con with D-pad conversion | $19.30 |
| Full Switch Shell Set (Glow in Dark Green) | Console + Joy-Con housing, complete kit | $27.75 |
| Clear Black Full Shell Set | Transparent smoke finish, all parts | $21.99 |
| Classic SwitchCube Shell Set | Retro GameCube-inspired design | $36.59 |

Part 1: Joy-Con Shell Replacement
Joy-Con shells are the most popular replacement because they:
- Take less time than the full console
- Have lower risk of damaging critical components
- Create the biggest visual impact
Step-by-Step: Right Joy-Con
Step 1: Remove the Wrist Strap Rail Screws
- Locate the 4 tri-wing screws on the back of the Joy-Con
- Remove them in any order
- Place screws on magnetic mat or labeled container
💡 Tip: Apply firm downward pressure while turning to prevent stripping. These screws are soft metal.
Step 2: Separate the Shell Halves
- Insert plastic spudger at the seam between front and back shell
- Gently work around the perimeter
- Do not force — if it won’t budge, check for missed screws
- The halves will separate, revealing the internal assembly
Step 3: Disconnect the Battery
- Locate the battery connector (small white plug)
- Use plastic spudger to gently lift the connector
- Never pull by the wires — always push from the connector base
⚠️ Safety: Always disconnect the battery before handling ribbon cables to prevent short circuits.
Step 4: Remove the Midframe Assembly
- Remove the 3 Phillips screws holding the midframe
- Gently lift the entire assembly, keeping ribbon cables connected
- Note the position of the trigger button springs — they can pop out
Step 5: Transfer Components to New Shell
- Place the midframe assembly into the new shell
- Ensure all ribbon cables are properly seated
- Check that buttons and triggers move freely
- Reinstall midframe screws
Step 6: Reconnect Battery and Close Shell
- Reconnect the battery connector — press until it clicks
- Align front and back shell halves
- Press together until clips engage
- Reinstall the 4 tri-wing screws
Step 7: Test Before Finishing
Test these functions before declaring success:
- [ ] All buttons respond (A, B, X, Y, triggers)
- [ ] Joystick moves smoothly in all directions
- [ ] Joy-Con pairs with Switch
- [ ] Charging works when attached to console
- [ ] HD Rumble functions
Part 2: Left Joy-Con Shell Replacement (With D-Pad Upgrade)
The left Joy-Con follows similar steps but offers an upgrade opportunity: replacing the directional buttons with a D-pad.
Why Upgrade to D-Pad?
| Standard Buttons | D-Pad |
|---|---|
| 4 separate buttons | Single directional pad |
| Requires precise presses | More forgiving input |
| Modern feel | Retro gaming feel |
| Better for menus | Better for 2D platformers, fighting games |
D-Pad Installation Notes
- The D-pad shell includes a conductive pad that replaces the button membranes
- Alignment is critical — misaligned D-pads cause stuck inputs
- Test diagonal inputs during reassembly
Recommended: eXtremeRate Joy-Con D-Pad Shell (Glacier Blue) — includes the D-pad mechanism, conductive pad, and all buttons.
Part 3: Console Shell Replacement
Replacing the console shell is more complex than Joy-Cons. Expect 60-90 minutes for your first attempt.
What’s Involved
- Back plate removal (straightforward)
- Front frame replacement (requires screen work)
- Kickstand transfer
- Side rail handling
Console Back Plate Replacement
Screws to remove:
- 4 tri-wing screws on corners
- 2 tri-wing screws on top edge
- 2 Phillips screws under kickstand
- 1 center screw on each side rail
Process:
- Remove all screws in order, placing on magnetic mat
- Pop out kickstand and remove screws underneath
- Lift back plate from bottom edge
- Unclip carefully around perimeter
Recommended: eXtremeRate Clear Black Back Plate with Kickstand — drop-in replacement for the back shell, no cable handling required.
Console Front Frame Replacement
⚠️ Warning: Front frame replacement requires disconnecting the screen ribbon cable and is the highest-risk part of this project. Consider whether the cosmetic improvement justifies the risk.
Why it’s difficult:
- Screen ribbon cable is fragile
- Adhesive holds screen to frame
- Easy to damage display with heat or pressure
If proceeding:
- Remove back plate first
- Disconnect all ribbon cables from main board
- Remove heat sink assembly
- Remove main board
- Heat adhesive around screen edges (optional, helps separation)
- Transfer screen to new frame
- Reverse reassembly
-
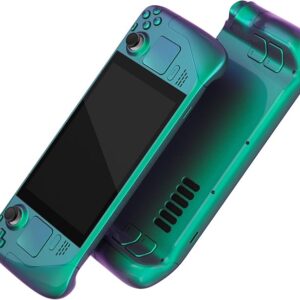
Steam Deck Accessories
eXtremeRate Full Steam Deck LCD Shell Kit (Chameleon Green Purple)
$55.14 Add to cart -
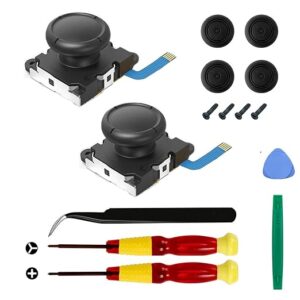
Nintendo Switch Shells
Veanic Joy-Con Drift Repair Kit for Switch, OLED, and Lite (2-Pack)
$12.99 Add to cart
Common Mistakes and How to Avoid Them
Mistake 1: Stripping Tri-Wing Screws
Problem: Soft metal screws strip easily with improper technique.
Prevention:
- Use correct-size screwdriver (Y00, not Y0)
- Apply downward pressure while turning
- If resistance increases, stop and reassess
Fix: Use rubber band for grip, or drill out stripped screws as last resort.
Mistake 2: Tearing Ribbon Cables
Problem: Ribbon cables are delicate and expensive to replace.
Prevention:
- Flip the locking tab before pulling cables
- Pull connectors, not cables
- Work slowly and never force
Fix: Replacement cables available but require soldering for some models.
Mistake 3: Losing Small Screws
Problem: Tiny screws disappear easily.
Prevention:
- Work on magnetic mat
- Remove screws in order, place in sequence
- Use labeled containers for different sections
Mistake 4: Misaligned Buttons After Reassembly
Problem: Buttons stick or don’t register properly.
Prevention:
- Check button alignment before closing shell
- Ensure rubber membranes are seated correctly
- Test before fully tightening screws
Fix: Reopen and reposition button components.
Mistake 5: Forgetting to Disconnect Battery
Problem: Short circuits can damage electronics.
Prevention:
- Always disconnect battery as first internal step
- Reconnect battery as last step before closing
Troubleshooting After Replacement
Joy-Con Won’t Connect
- Check that all ribbon cables are fully seated
- Verify battery is connected
- Try pairing via Bluetooth instead of rail
- Reset Joy-Con by pressing sync button for 5 seconds
Buttons Not Responding
- Open shell and check button membrane alignment
- Ensure conductive pads are in correct position
- Look for debris under buttons
- Test with multimeter if available
Trigger Feels Wrong
- Check trigger spring position
- Verify no debris in trigger mechanism
- Compare to other Joy-Con for reference
Console Won’t Turn On After Shell Swap
- Reconnect battery firmly
- Check main ribbon cable to motherboard
- Verify no cables were pinched during reassembly
- Try charging for 30 minutes, then power on
Recommended Shell Kits from ModZone
| Product | Style | Best For | Price |
|---|---|---|---|
| Joy-Con Shell Kit (Chameleon Purple Blue) | Color-shifting iridescent | Unique visual effect | $23.97 |
| Joy-Con Shell Kit (Clear Black) | Transparent smoke | See-through aesthetic | $21.44 |
| Joy-Con Shell Kit (SNES Classic EU Style) | Retro Nintendo colors | Nostalgia | $25.23 |
| Full Switch Shell Set (Glow in Dark Green) | Luminescent | Night gaming | $27.75 |
| Great Golden Wave D-Pad Shell | Artistic design + D-pad | Collectors | $19.99 |
All kits include: Replacement housing, buttons, screwdriver set, and installation guide.
Browse All Nintendo Switch Shells →
Frequently Asked Questions
How long does it take to replace a Nintendo Switch shell?
A full console shell replacement takes 60-90 minutes for beginners. Joy-Con shells alone take 30-45 minutes per controller. With experience, these times drop significantly.
Will replacing my Switch shell void the warranty?
Yes. Opening your Nintendo Switch voids any remaining warranty. Only proceed if your warranty has expired or you accept this trade-off. Most shell replacements are performed on consoles past warranty anyway.
What tools do I need to replace a Switch shell?
Essential tools:
- Tri-wing Y00 screwdriver
- Phillips #00 screwdriver
- Plastic spudger
- Tweezers
Most shell kits include basic tools. For frequent modding, invest in a quality screwdriver set.
Can I replace just the Joy-Con shells without touching the console?
Yes. Joy-Con shell replacement is completely independent of the main console. Many users start with Joy-Cons because they’re easier and lower risk than console shell work.
What is the difference between Switch and Switch OLED shells?
The Switch OLED has a different internal layout and larger screen. Shells are not interchangeable between models. Always verify compatibility before purchasing. Joy-Con shells work across original Switch, V2, and OLED models.
Can I reuse my original buttons with a new shell?
Usually yes. Buttons are transferable if they’re the same size. However, new shells often include matching buttons, and color coordination works better with the included set.
What if I damage a ribbon cable during replacement?
Replacement cables are available but may require soldering for permanent repair. For Joy-Cons, replacement ribbon cables are relatively affordable. For the console, consider professional repair.
Final Thoughts
Replacing your Nintendo Switch shell is a rewarding project that combines practical repair skills with creative customization. Whether you’re restoring a scratched console or creating a one-of-a-kind design, the process is manageable with patience and the right tools.
Start with Joy-Cons if you’re new to console modding. The lower risk and shorter time commitment make them ideal practice before tackling the full console.
Key takeaways:
- Verify model compatibility before buying shells
- Use proper tools and work slowly
- Disconnect battery before internal work
- Test functionality before fully reassembling
Ready to start your build? Browse Nintendo Switch shells at ModZone →
Related Guides
- Joy-Con Drift Repair Checklist: What to Replace, What to Calibrate
- Controller Comfort Is a Build Decision: Grip Texture and Button Force
- ModZone Compatibility Guide
- Installation Guide
About the Author
ModZone specializes in premium gaming console shells and accessories with a focus on fit, finish, and clear compatibility guidance. Our team tests products with real hardware and writes guides that support buyers through the installation process.